


What you will build
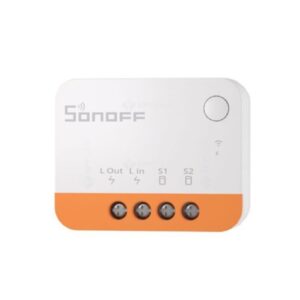
This project combines a Shelly 1PM Gen4 relay, Sonoff SNZB-06P presence sensor and Sonoff SNZB-04P door sensor. The mmWave sensor keeps the room occupied during quiet work, the contact supplies a reliable entry event, and the relay preserves physical wall-switch control while measuring the lighting circuit.
Before you start
- Confirm that Home Assistant, a supported Zigbee coordinator and current backups are available. The coordinator and USB-C supply are not included in the kit.
- Check that the Shelly fits the enclosure and that the supply, neutral, circuit protection and lighting load meet its requirements.
- Isolate and prove the circuit dead before relay work. Use a qualified electrician where required.
- Choose a presence-sensor position away from moving curtains, fans and detection through thin walls.
1. Pair and name the sensors
Pair the presence and door sensors one at a time. Use names such as Office presence and Office door, then verify occupied, clear, open and closed states before mounting. Align the door sensor and magnet within the manufacturer tolerance.
2. Install and verify the Shelly relay
Have the Shelly installed according to its wiring diagram. Add it to Home Assistant using one supported local integration, name the controlled entity Office light, and verify the wall switch and Home Assistant can each turn the circuit on and off.
3. Tune presence before automating
Observe the sensor for a full day. Confirm it detects someone seated at the desk, clears when the room is empty, and ignores movement outside the intended zone. Fix placement or sensitivity before compensating with long automation delays.
4. Build two simple automations
- Turn the light on when presence changes to occupied and the room is expected to be dark.
- Also evaluate the on condition when the door opens so entry feels immediate.
- Turn the light off only when presence remains clear for three minutes.
- Do not use a closed door as proof that the room is empty.
5. Preserve manual intent
Create a helper named Office lighting automatic. Run the on and off actions only while this helper is enabled. Put the helper on the household dashboard so anyone can suspend automation without disabling the relay or losing the wall switch.
6. Commission the finished setup
- Test entry, seated work, leaving, returning during the off delay and manual override.
- Restart Home Assistant and temporarily disconnect the Zigbee coordinator.
- Confirm the physical switch still leaves the circuit in a safe, understandable state.
- Review false-positive zones and energy readings for several days before finalizing sensitivity and delay.
Need Help?
Let us do it for you
Professional installation options are planned. This is a non-functional placeholder for now.
- Professional installation
- Full setup included
- Custom automations